Tag Archives: condensed milk

Chocolate Tres Leches Cake

Chocolate Tres Leches

Chocolate Tres Leches

When I first tasted Tres Leches I was tickled pink with delight. It was an actual OMG moment. So I hunted around for recipes and finally make one. It was a hit. Well if you think about it you are getting the most moist (well actually flooded with liquid) cake with an amazing topping (not buttercream).

Being the chocolate lover that I am I decided to make a chocolate version of it. A chocolaty cake, with chocolate syrup and topped with a chocolate topping. Yes, its about dying and going to heaven. Now that was a hit that it was everyone’s favorite. It was the most requested cake at the office. It did help that it also had a nice swig of alcohol. The alcohol is totally optional and I have used rum, brandy and liqueur (grand mariner).

This I think has been the absolute best version ever. I made it when one of my dear friends was leaving Atlanta for good. He is the one who did the website design for me. I will miss you, but then you know Atlanta is just a flight away :-).  This is what he asked for and the request was to make it with Dark chocolate. He said it was the best one ever.

I have also given options for a cheat version of using a devil’s food cake mix. This is if you just want to throw something quickly. I have also used Dark Chocolate for the mousse, feel free to substitute a milk chocolate.

Ingredients

Servers 12 -15
For the cake:
Adapted from here by David Lebovitz
  • 9 tablespoons unsweetened cocoa powder (optional – I did not use it)
  • 1½ cups flour
  • ½ teaspoon salt
  • 1 teaspoon baking soda
  • ¼ teaspoon baking powder
  • 4 ounces unsalted butter, at room temperature
  • 1½ cups granulated sugar
  • 2 large eggs, preferably at room temperature
  • ½ cup strong espresso (2 teaspoons espresso)
  • ½ cup whole milk
  • OR Use a Devil’s food cake mix

for the Tres Leches

  • 1/4 cup whole milk
  • 1 can (14 1/2 ounces) sweetened condensed milk
  • 1 cup heavy cream
  • 3 tablespoons chocolate syrup (Hershey’s)
  • 1/4 cup brandy (optional)

for the Chocolate Mousse Frosting (Contains raw eggs – see Note below for alternate)

  • 7 ounces chocolate chips (dark chocolate at least 60% cocoa)
  • 1/4 cup heavy cream
  • 6 large egg yolks
  • 1/4 cup sugar
  • 2 tablespoons Brandy (optional)
  • 1 1/2 cups heavy cream, whipped (use less if you want a thicker mousse)

Method

for the cake

If you are using the Food cake mix, bake the cake according to the package instructions for a 13 x 9 pan. Let if cool for 15 minutes. Run a knife around the edges of the cake pan and use a toothpick to poke (a fair number of) holes in the cake. Then pour in the Tres Leches.

or
Preheat oven to 350F. Butter a 13×9 inch pan and set it aside.
Sift cake flour, salt, baking soda and baking powder into a bowl. Sift the cocoa powder too if you are using it.

Using an electric mixer with the paddle attachment, beat the butter and sugar until smooth and fluffy. It took me about 10 minutes as my butter (even though it was sitting out for a good two hours) was still fairly cold. If your paddle attachment does not have a scraper, make sure you scrape the sides of the bowl. Add the eggs one at a time, beating well (and scraping) after each addition.

Add half the flour mixture into the bowl and use the mixer on low to incorporate. Add the wet ingredients and stir with a spatula, and once incorporated use the mixer again. Add the rest of the flour mixture and mix until incorporated. 

Bake for about 25-30 mins until a toothpick pierced into the center comes out clean. Let the cake cool on the rack for about 10 mins. Using a toothpick prick the cake all over. Using a butter knife, run it around the sides of the cake to release it from the pan.

Make the Tres Leches milk mixture and then pour over the cake, ladle by ladle making sure that you are distributing it equally over the cake and sides. Let each pouring be absorbed before you pour the next one. Let the cake cool completely.

for the Chocolate Mousse

In a glass bowl add the chocolate and 1/4 cup heavy cream and heat in the microwave for about 2 minutes. Let the mixture sit for about 30 seconds and then stir mixture to combine. If all the chocolate does not melt then repeat process in the microwave for short bursts. Set aside to cool.

Using an electric mixer on high speed, beat the egg yolks and sugar in a mixing bowl until pale yellow and has doubled in volume. This will take a little time, so be patient. Fold in the cooled chocolate mixture and stir till well combined. Add the Brandy and stir to combine.

Beat the remaining heavy cream in the electric mixer on medium speed until you see it start to thicken. Add a teaspoon of sugar and increase the speed to high, beat until the cream just reaches the stiff peak stage. Gently fold in the whipped cream into the chocolate mixture, folding until thoroughly incorporated. Put it over the cooled cake and refrigerate until ready to serve.

NOTE:

Eggless chocolate mousse topping

Heat 1 cup cream to boiling. Add 8 oz of chocolate and let it rest for about a minute. Then stir to incorporate. Add 1 tablespoon of your favorite brandy/liqueur. Whip 1 cup of heavy cream and fold into the chocolate mixture.


Coconut Ice

Coconut Ice

Coconut Ice

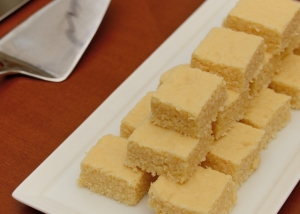
Coconut is one of my favorite foods. In India we drink the water from the young/tender coconuts. We are also quite used to drinking them at their temperature. I was with a couple of friends from London recently who remarked that this would be so much better if it was chilled. The thought had never even crossed my mind. Mind you, I normally like room temperature water so its not like that  spark would ever had made it in my mind.

I was in Jamaica and we had just finished breakfast and were sitting down watching the ocean and the guard comes up to us and asks us if we would like to have a coconut. We all said yes really quickly. Well he proceeded to get a ladder that he then put up against the coconut tree. The ladder reached less than half way up the tree. He then removed his boots and climbed up this 12 step bamboo ladder. His implement to get at these coconuts was a really long pole with a blade attached at the end. He used this to attempt to saw the coconuts from the tree. We were a on pins and needles that something bad was going to happen. Luckily one of the kitchen lads came out and made him get down. The lad then shimmied (for lack of a better term) up the tree and proceeded to hack at the coconuts. These were some huge coconuts and we had fun drinking the juice and then eating the tender coconut flesh. The guard then challenged us to fling the coconuts as far as we could and bet that he could do better than any of us. Unfortunately for the guard, he did not know Brandon who did an amazing throw. (And no we did not bet with him).

This was one of my favorite sweets to eat at Christmas time. People would make them in all colors. We did make an amazing amount of sweets at Christmas and would take a plate of different sweets to everyone we went to visit. It was really a thrill to get sweets from people you knew were good sweet makers. Hope you enjoy this one and get a chance to eat a tender/young coconut at some point!

Ingredients

  • 2 cups icing sugar, sifted
  • 1/4 tsp cream of tartar
  • 14oz (396gm) sweetened condensed milk
  • 3.5 cups desiccated coconut
  • food coloring (optional)

Method

Butter and line an 8 inch square pan.  I cut two rectangular strips that lay over each other and extend over the sides. This makes it easier to lift the coconut ice out of the pan.

Combine sugar and cream of tartar in a mixing bowl. Then add the condensed milk and desiccated coconut and stir till combined. Use a sturdy spoon as the mixture does become thick. There is also no issue with over stirring. Once you have everything mixed well you can do two things just leave the color as is or divide the mixture into two equal parts, coloring one part.

If you have not colored the  mixture just put it in your pan and level with the back of a spoon. If you did color half the mixture, put the first part into the pan, level it, then add the next portion making sure to level again.

Refrigerate until set about 2 hours. Remove from the refrigerator. Use a serrated (bread) knife to cut into squares. Wipe the knife clean between cuts to get neat cuts and prevent the knife from sticking.


Sticky Toffee Cake with Butterscotch sauce

Sticky Toffee Cake

Sticky Toffee Cake

The very first time I ate Sticky Toffee pudding I was smitten. It was the moist pudding with the rich gooey sauce how could you go wrong. I would have licked the plate if I could. I am sure somewhere in the world licking ones plate is a sign that you really liked the meal. Now all of you that are going ewwww, I would say think back when you were a child and did not care what people thought – that would be the case with this dessert – you just want to lick the plate clean!.

I have done many variations of this over the years and decided to try one of the recipes from a book my sister sent me ‘100 years of sweet memories’ (using Nestle’s condensed milk). She knows I have a terrible sweet tooth and always ate condensed milk out of a can when I was young (those days are sadly quite done for me). What a treat of a book – everything you can make with condensed milk. I should also say she makes a killer sticky toffee cake.

This recipe is really simple and did call for just adding the flour and mushed dates all at once, so you can certainly do that. I do my normal thing with cakes which is add a dry ingredient then wet ingredient -repeat ending with the dry ingredient. They also added sultanas which I did not have at home and I was too lazy to get. One variation before you serve the cake is to pour the sauce over it and pop it into the oven for 10 minutes so that the cake heats up with the sauce. However, if you just warm the cake and pour the warm sauce over each slice, it works just fine. You can store the cake in the fridge wrapped in cling film for up to 5 days if it lasts that long. Just follow the instructions below when you take it out of the fridge.

I had doubled the recipe and made two cakes. One got over right away and I took the other into work and put a sign with instructions that read.

  • Cut a slice
  • Pour sauce
  • Heat in microwave for 5-7 seconds
  • Enjoy

Everyone did enjoy the cake and gave it rave reviews.

Ingredients

serves 10-12 

for the cake

  • 200g pitted dates
  • 1 cup water
  • 1 tsp baking soda
  • 125g unsalted butter (softened)
  • 1/2 cup granulated sugar
  • 1/2 cup sweetened condensed milk
  • 2 eggs
  • 2 tsp vanilla essence
  • 1.5 cups self raising flour

for the butterscotch sauce

  • 1 1/4 cups packed dark brown sugar
  • 1/4 cup  butter
  • 1/2 cup cream
  • 1/4 cup brandy (optional)
  • 1/2 tsp vanilla extract

Method

for the cake

Preheat the oven to 350F. Grease and line an 8 inch round pan with baking paper. (I used a silicone pan so I only lightly greased it).

Put the dates and water into a saucepan and place on medium heat and bring to a boil. Reduce the heat and let it simmer for 5 minutes. Turn off the heat and add the baking soda and stir. Set it aside to cool a bit. Then partially blend using a hand blender (the goal is to have smaller pieces of dates).

Cream the butter and sugar until light, pale and fluffy. Add a half cup of the condensed milk, one egg and the vanilla extract. Beat to combine. Then add the next egg and beat to combine. Now alternate adding the flour and dates in three batches folding in gently until combined. Pour the mixture into the pan. Bake for 40-45 minutes (Do the toothpick test – which should come out clean when inserted into the center of the cake).

for the butterscotch sauce

Place the sugar, butter and cream in a saucepan over medium heat. Let the mixture come to a boil and then reduce the heat and simmer until all the sugar has dissolved (stirring). This will take about 5 minutes. Take it off the heat and add the vanilla and optional alcohol carefully. Stir to incorporate. Serve this warmed over the cake.

To serve, pour some of the heated sauce over the cake and then over each slice as it is cut.


Cocado – Amaze Balls

Cocado

Cocado

I have been to Push Start Kitchen (an underground supper club in Atlanta) twice so far. Zach and Cristina are absolutely delightful hosts. Zach is an amazing chef and the food so far has never failed to please both visually and tantalize my taste buds always leaving me wanting to go back for more. I have to thank my friend Kiana for introducing me to that place.

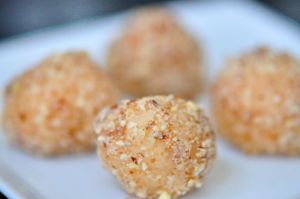
On both occasions they have ended with this delightful Costa rican treat. I went googling on line for a recipe for it and found something called a Cocada. I went ahead and tried it out but reduced the sugar as it just seemed way too  much sugar at 2 cups!. Zach rolls his in powdered honey. I decided to roll the ones I made in a mix of almond and pecan grinds. I loved it and so did everybody else. Now these are  nowhere near as delicious as Zach’s but at the moment they will do.

The reason I called them Amaze Balls – is because that is the name Sumier came up with after he had the first one and Yen happily agreed.

I did one more modification, I took a quarter of the mixture and then added Lilikoi syrup to it and cooked it for a little longer to dry up the syrup. So I got a Lilikoi flavour to it – and those were simply delightful as well.

Recipe

  • 1 can sweetened condensed milk
  • 1 1/4 cans granulated sugar – use the empty condensed milk can to measure it
  • 1 lb frozen grated coconut (unsweetened)
  • 1/4 cup of milk
  • 1 tsp vanilla extract
  • 1 cup almonds (skins on)
  • 1 cup pecans

Method

Grease a baking sheet with butter and set aside.

Mix the condensed milk, sugar, coconut, vanilla extract and milk in a heavy-bottom saucepan and cook over medium-low heat, stirring constantly. When the bottom of the pan starts to show and the mixture is a bit thicker (20-25 minutes) and the color has turned a little turn off the heat. Pour the mixture on the baking sheet – spread out and let it cool.

Use your food processor to pulse the almonds and pecans to a powder.

Once the mixture is cool, using a small cookie scoop or two spoons, scoop the mixture, roll it into a tight ball between your palms and then roll it in the ground nut powder. Thats it!


Mango Três Lêches

Mango Tres Leches

Mango Tres Leches

The first time I had Três Lêches (three milk) cake I thought I had died and gone to heaven (it happens to me a lot). I simply had to have myself a couple of more helpings. Then one day I decided to go ahead and try it out for a party. It was a super success. I then made a chocolate version which everyone loved more than the regular Três Lêches. Recently I decided to try a mango version seeing that mangoes are coming back into season – with some wonderful yummy mangoes that I got at the local H-Mart. I ended up just eating the mangoes but used mango purée for the cake.

There are a variety of mangoes that you can get. Here in the US the Mexican Kent mangoes are really good. You have to wait until the mango has started to yellow (the process can be quickened by keeping them with bananas). They will have a little give when pressed and have a fragrant aroma then you know they are ready. You can slice the mango from the top to the bottom on both sides of the very large seed that it has. At this point I normally like just spooning the juicy sweet flesh straight into my mouth. For a nice presentation you can scour the flesh into cubes and then use a spoon to scoop out the cubes. Alternatively you can use a peeler to peel the skin and then scour the flesh.

Recipe

For the cake

  • 6 eggs, at room temperature
  • 1 cup sugar
  • 1 cup all-purpose flour
  • pinch of salt

For the soaking syrup

  • 1 can sweetened condensed milk
  • 1 can evaporated milk
  • 1 cup heavy cream
  • 1 cup mango purée
  • 1 teaspoon almond extract
  • dark rum

For the mango mousse

  • 1 cup heavy cream
  • 8 tablespoons granulated sugar
  • 12 tablespoons mango purée

Method

Preheat oven to 350 degrees F.

Whip the eggs, sugar, and salt until tripled in volume. This will take a little time. It took me about 9 mins in my kitchenaid. You will get a lovely light lemon colored thick batter. Detach the mixing bowl from the stand (if you are using a kitchenaid mixer) and sift the cup of flour over the batter. Then fold it in. Make sure it is completely folded in.

Butter a 9×13 glass dish and then pour in your batter. Bake for 25 mins (that was how long it took in my oven). You can do the toothpick test here – it should come out clean. Wait for about 5 mins and then start pricking it all over either with the toothpick or to go faster with a fork. You need to get a lot of holes.

In a big measuring cup (the Pyrex variety – you can use any container here I like the pouring lip) mix the milks, the mango purée, the vanilla extract and rum.  Pour over the cake starting at one end and ending at the other. Wait a few mins till the milk is absorbed and repeat. Do this until you have all the liquid poured into the cake.

Wait until the pan cools completely and then you can put it into the refrigerator.

To make the mango mousse

Whip the heavy cream and as it starts to increase in volume slowly add the granulated sugar. Whip it until it forms stiff peaks. At this stage you can add two tablespoons of mango purée and fold in. Continue adding and folding the mango purée. You can add more or less purée (depending on how mangoey you want it to taste go ahead be experimental!!). Spread this on top of the cold cake and refrigerate.

You can serve this with fresh mango slices or all by itself.